


React Native experiments installation
- 1
Install PostHog React Native SDK
RequiredOur React Native enables you to integrate PostHog with your React Native project. For React Native projects built with Expo, there are no mobile native dependencies outside of supported Expo packages.
To install, add the
posthog-react-nativepackage to your project as well as the required peer dependencies.Expo apps
TerminalReact Native apps
TerminalReact Native Web and macOS
If you're using React Native Web or React Native macOS, do not use the expo-file-system package since the Web and macOS targets aren't supported, use the @react-native-async-storage/async-storage package instead.
Configuration
With the PosthogProvider
The recommended way to set up PostHog for React Native is to use the
PostHogProvider. This utilizes the Context API to pass the PostHog client around, and enables autocapture.To set up
PostHogProvider, add it to yourApp.jsorApp.tsfile:App.jsThen you can access PostHog using the
usePostHog()hook:React NativeWithout the PosthogProvider
If you prefer not to use the provider, you can initialize PostHog in its own file and import the instance from there:
posthog.tsThen you can access PostHog by importing your instance:
React NativeYou can even use this instance with the PostHogProvider:
React Native - 2
Capture conversion event
RequiredOnce PostHog is initialized, you should be able to capture events.
For this tutorial, let's capture a conversion event on a
<button id="cta">click.JSX - 3
Create an experiment
RequiredGo to the Experiments tab in the PostHog app and click on the New experiment button in the top right.

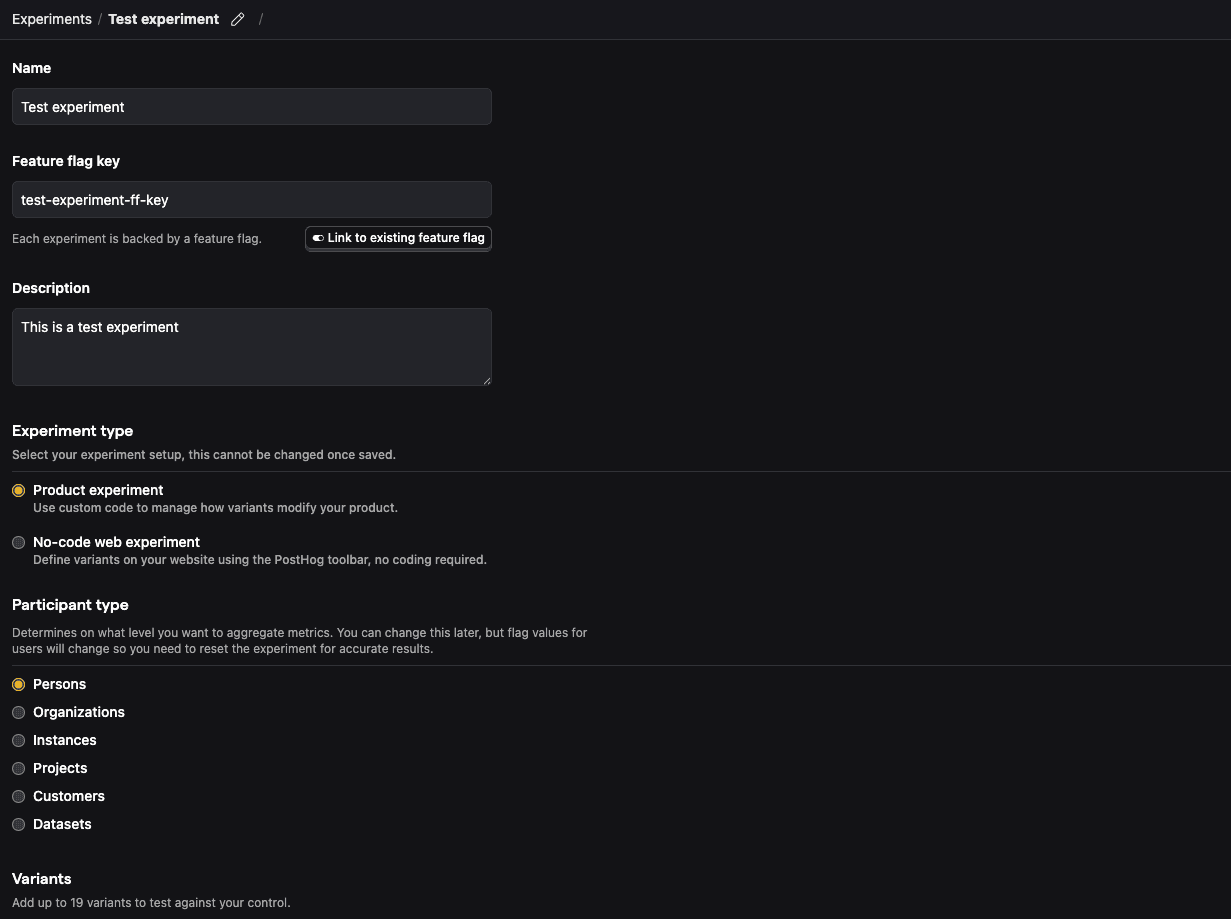
For this tutorial, let's create a new experiment using simplified test values:
- Name: "Test experiment"
- Description: "This is a test experiment"
- Feature flag key: "test-experiment-ff-key"
- Experiment type: "Feature flag"
- Variants: "control" and "test"
- Participant type: "Users"
Then click Save as draft.
- 4
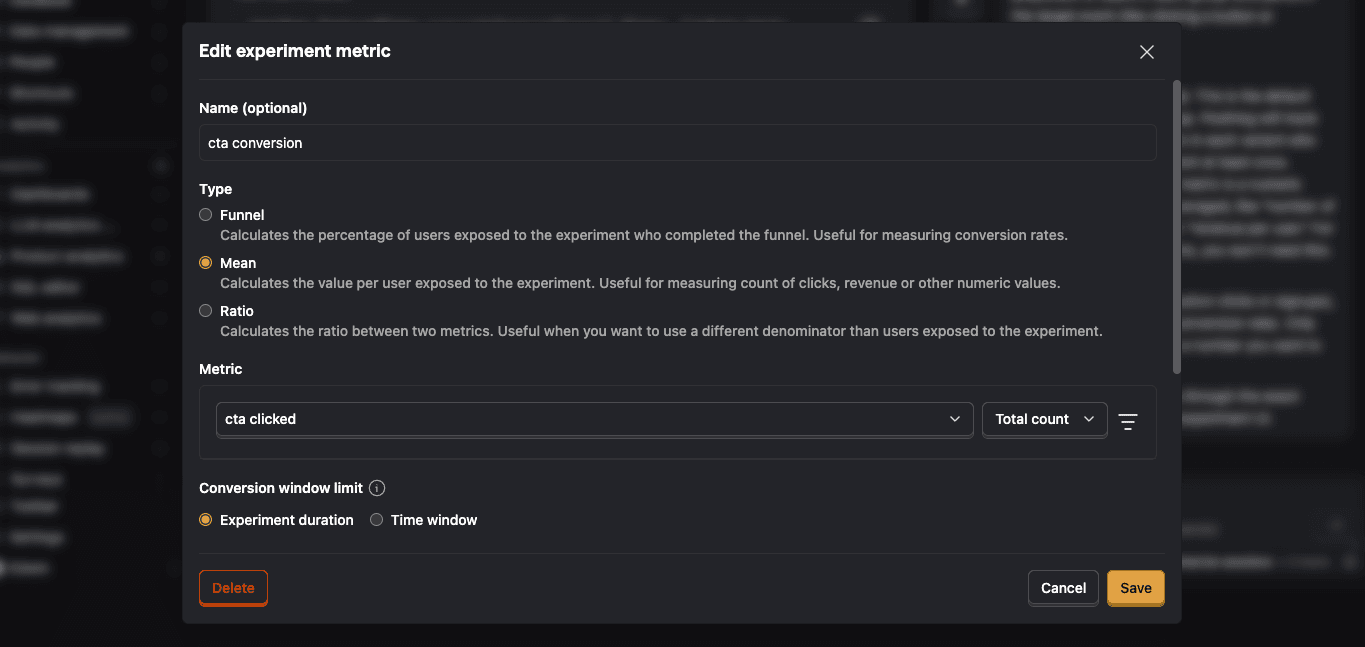
Add primary metric and launch
RequiredScroll down to the Primary metrics section and click + Add primary metric.
Choose Single-use and select Type > Mean.
Then search for the event
cta clickedunder Metric and click Save.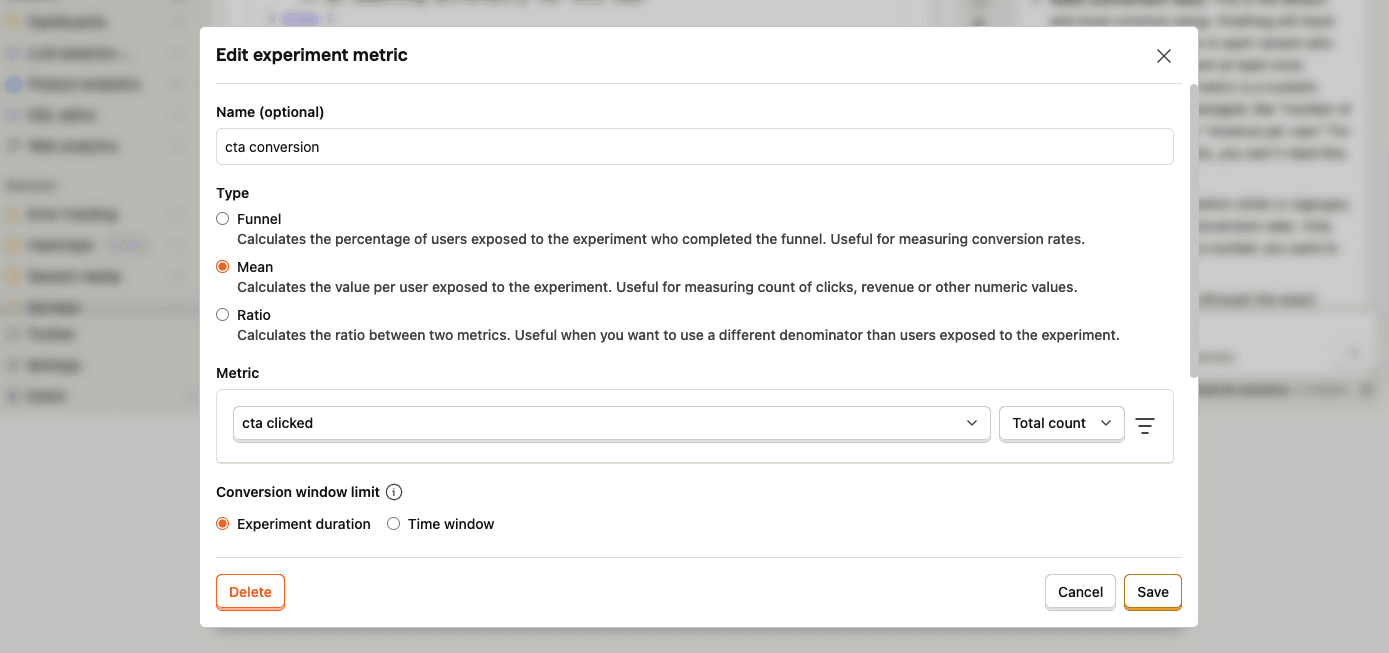
By default, experiments are exposed to 100% of users. You can customize release conditions to expose the experiment to a subset of users.
For this tutorial, we'll ship the experiment to all users and click Launch in the top right.
- 5
Call feature flag
RequiredUse the React hooks to evaluate the experiment flag and render the
<button id="cta">text based on the assigned variant.JSXNow when a user triggers a
cta clickedevent, PostHog automatically assigns the user to a variant and records an experiment exposure.By default, users are split equally between variants. If you want to assign specific users to a specific variant, see more about distribution and release conditions.
- 6
Evaluate experiment results
RecommendedAs you capture more
cta clickedevents, more exposures will populate the primary metrics in your experiment.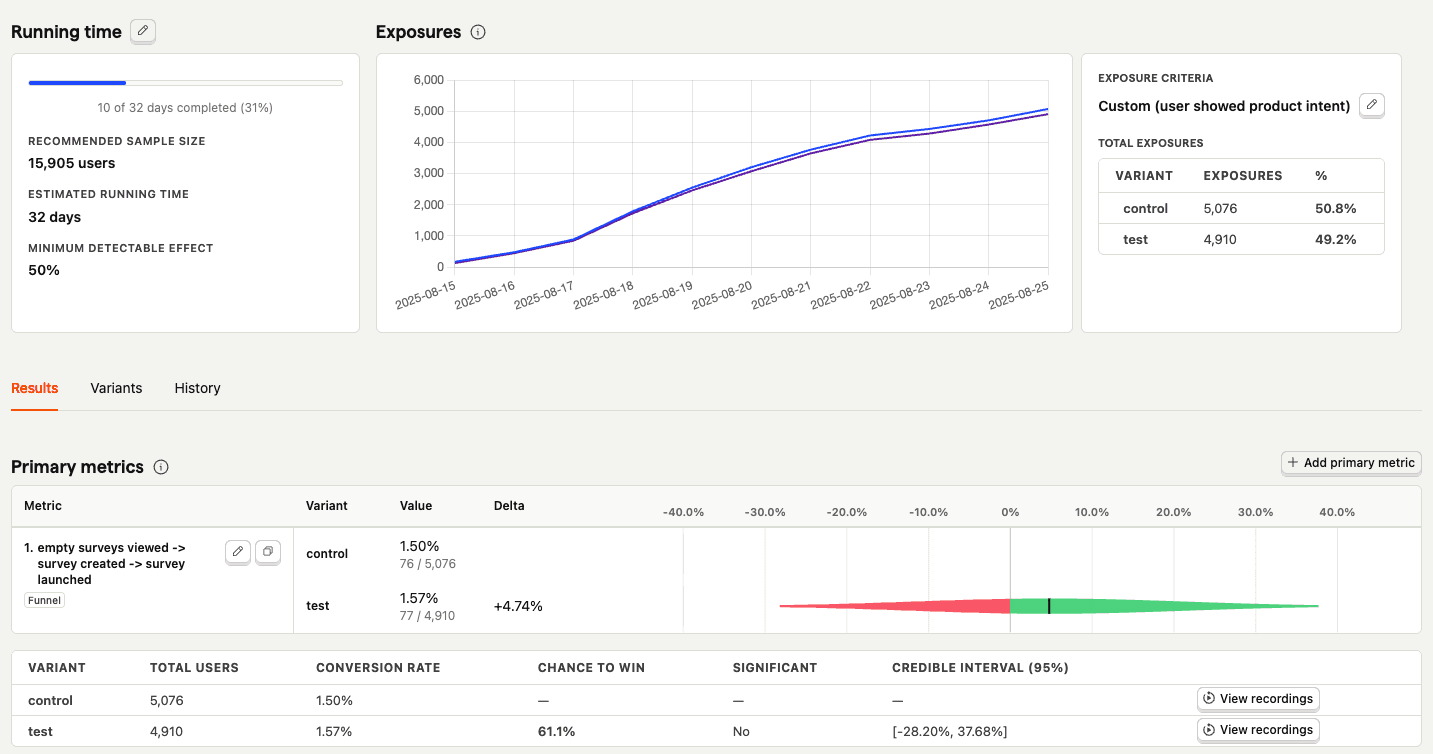
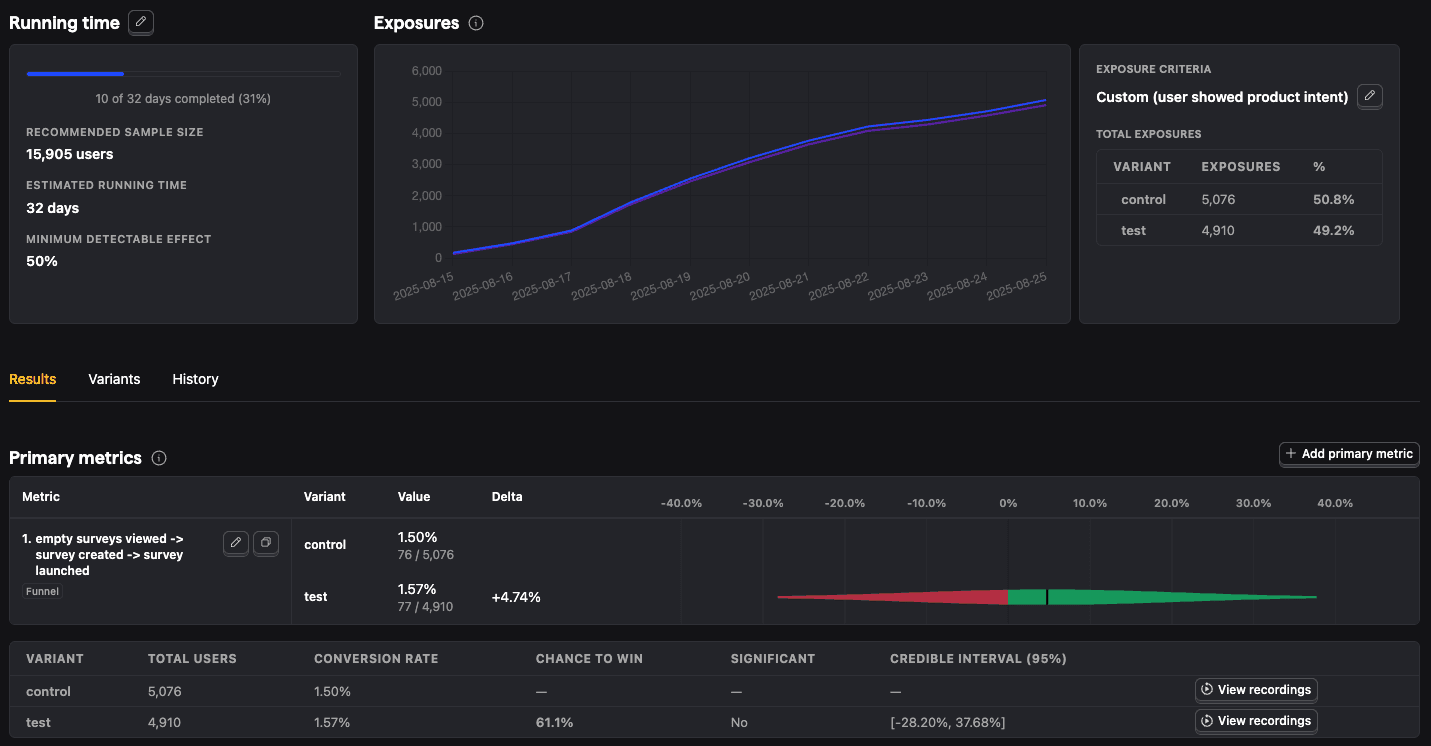
With enough data, you can analyze the experiment and its variants by:
- Conversion rates
- Statistical significance
- Credible intervals
- Chance to win %
- Minimum detectable effect
- And more