


.NET experiments installation
- 1
Install PostHog .NET SDK
RequiredThe
PostHogpackage supports any .NET platform that targets .NET Standard 2.1 or .NET 8+, including MAUI, Blazor, and console applications. ThePostHog.AspNetCorepackage provides additional conveniences for ASP.NET Core applications such as streamlined registration, request-scoped caching, and integration with .NET Feature Management.Note: We actively test with ASP.NET Core. Other platforms should work but haven't been specifically tested. If you encounter issues, please report them on GitHub.
Not supported: Classic UWP (requires .NET Standard 2.0 only). Microsoft has deprecated UWP in favor of the Windows App SDK. For Unity projects, see our dedicated Unity SDK (currently in beta).
TerminalIn your
Program.cs(orStartup.csfor ASP.NET Core 2.x) file, add the following code:C#Make sure to configure PostHog with your project API key, instance address, and optional personal API key. For example, in
appsettings.json:JSONNote: If the host is not specified, the default host
https://us.i.posthog.comis used.Use a secrets manager to store your personal API key. For example, when developing locally you can use the
UserSecretsfeature of thedotnetCLI:TerminalYou can find your project API key and instance address in the project settings page in PostHog.
Working with .NET Feature Management
PostHog.AspNetCoresupports .NET Feature Management. This enables you to use the <feature /> tag helper and theFeatureGateAttributein your ASP.NET Core applications to gate access to certain features using PostHog feature flags.To use feature flags with the .NET Feature Management library, you'll need to implement the
IPostHogFeatureFlagContextProviderinterface. The quickest way to do that is to inherit from thePostHogFeatureFlagContextProviderclass and override theGetDistinctIdandGetFeatureFlagOptionsAsyncmethods.C#Then, register your implementation in
Program.cs(orStartup.cs):C#With this in place, you can now use
featuretag helpers in your Razor views:HTMLMultivariate feature flags are also supported:
HTMLYou can also use the
FeatureGateAttributeto gate access to controllers or actions:C#Using the core package without ASP.NET Core
If you're not using ASP.NET Core (for example, in a console application, MAUI app, or Blazor WebAssembly), install the
PostHogpackage instead ofPostHog.AspNetCore. This package has no ASP.NET Core dependencies and can be used in any .NET project targeting .NET Standard 2.1 or .NET 8+.TerminalThe
PostHogClientclass must be implemented as a singleton in your project. ForPostHog.AspNetCore, this is handled by thebuilder.AddPostHog();method. For thePostHogpackage, you can do the following if you're using dependency injection:C#If you're not using a
builder(such as in a console application), you can do the following:C#The
AddPostHogmethods accept an optionalAction<PostHogOptions>parameter that you can use to configure the client.If you're not using dependency injection, you can create a static instance of the
PostHogClientclass and use that everywhere in your project:C#Debug mode
If you're not seeing the expected events being captured, the feature flags being evaluated, or the surveys being shown, you can enable debug mode to see what's happening.
To see detailed logging, set the log level to
DebugorTraceinappsettings.json:JSON - 2
Capture conversion event
RequiredOnce PostHog is initialized, you should be able to capture events. For your experiment to be meaningful, we need to capture an event that we want to measure, such as a conversion event.
For this tutorial, let's report a conversion event when a clicks a CTA. In server SDKs like Node, this can be called when a specific route is visited or reported from your client side app.
C# - 3
Create an experiment
RequiredGo to the Experiments tab in the PostHog app and click on the New experiment button in the top right.

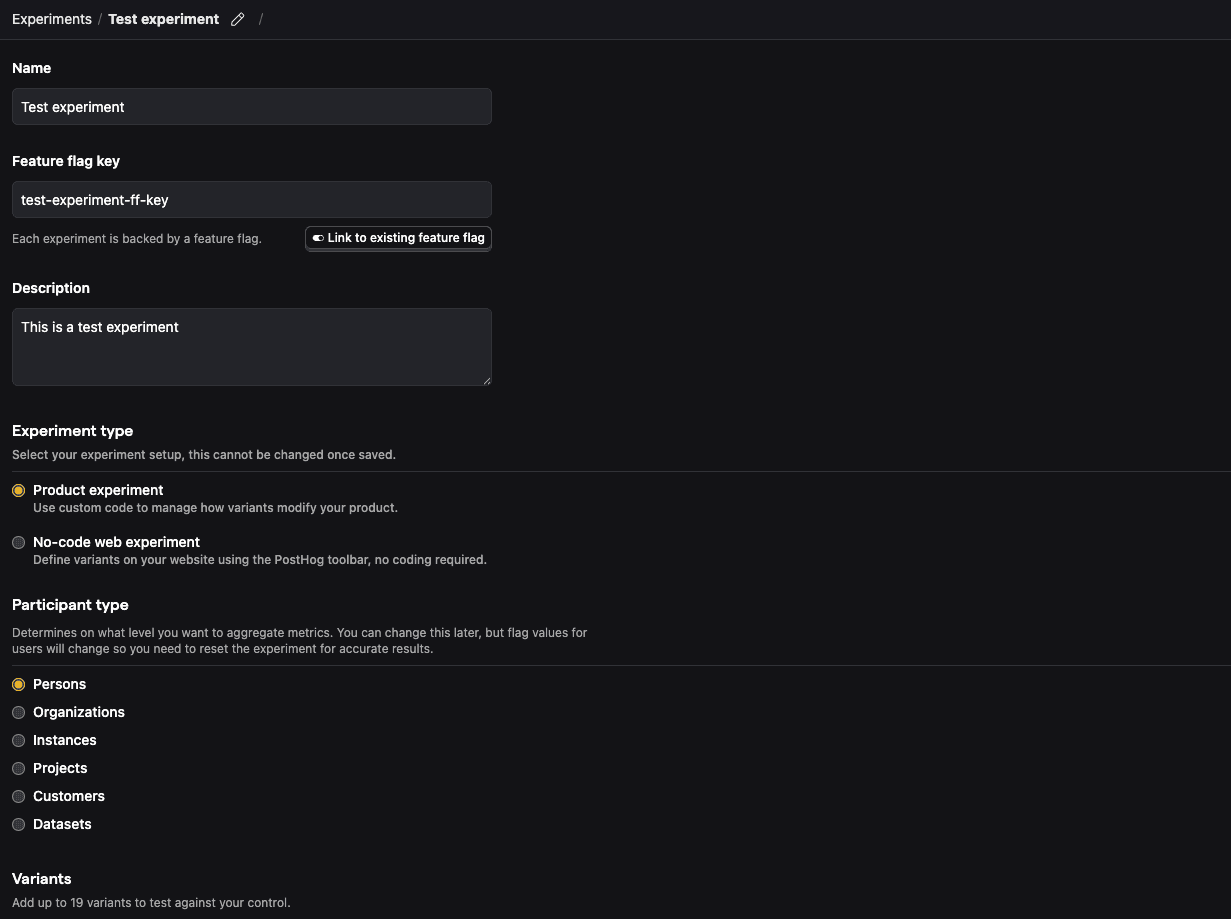
For this tutorial, let's create a new experiment using simplified test values:
- Name: "Test experiment"
- Description: "This is a test experiment"
- Feature flag key: "test-experiment-ff-key"
- Experiment type: "Feature flag"
- Variants: "control" and "test"
- Participant type: "Users"
Then click Save as draft.
- 4
Add primary metric and launch
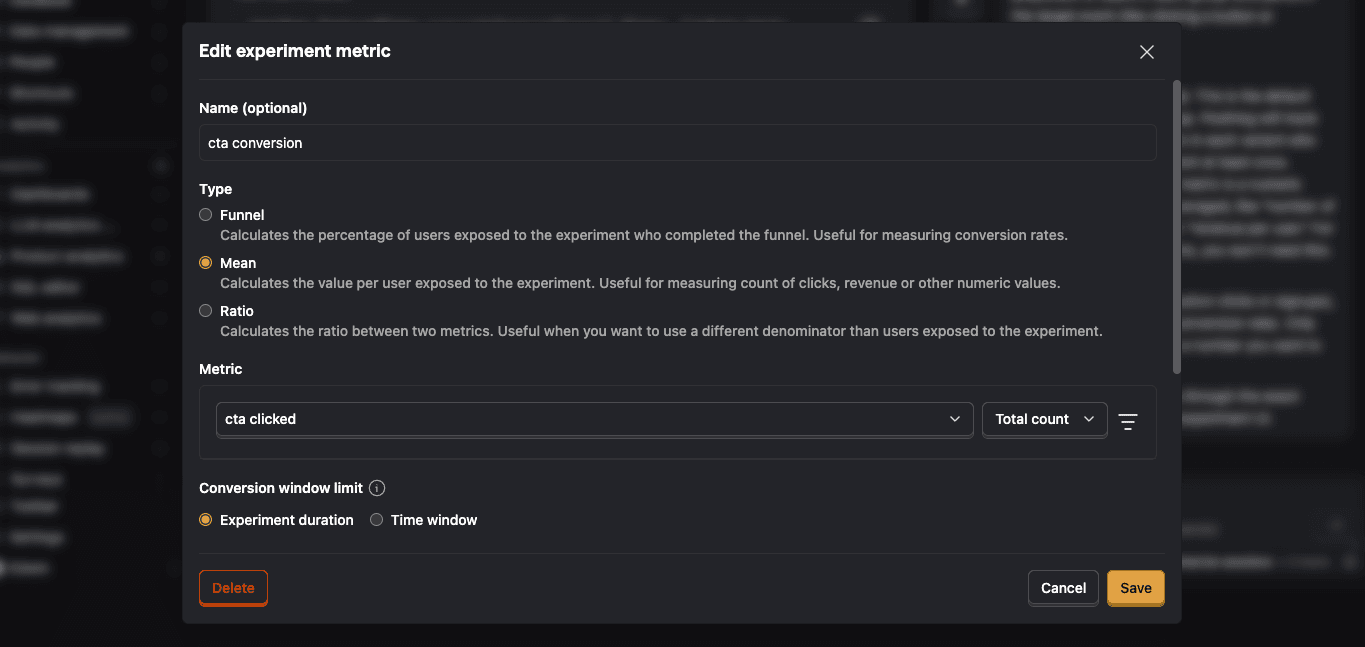
RequiredScroll down to the Primary metrics section and click + Add primary metric.
Choose Single-use and select Type > Mean.
Then search for the event
cta clickedunder Metric and click Save.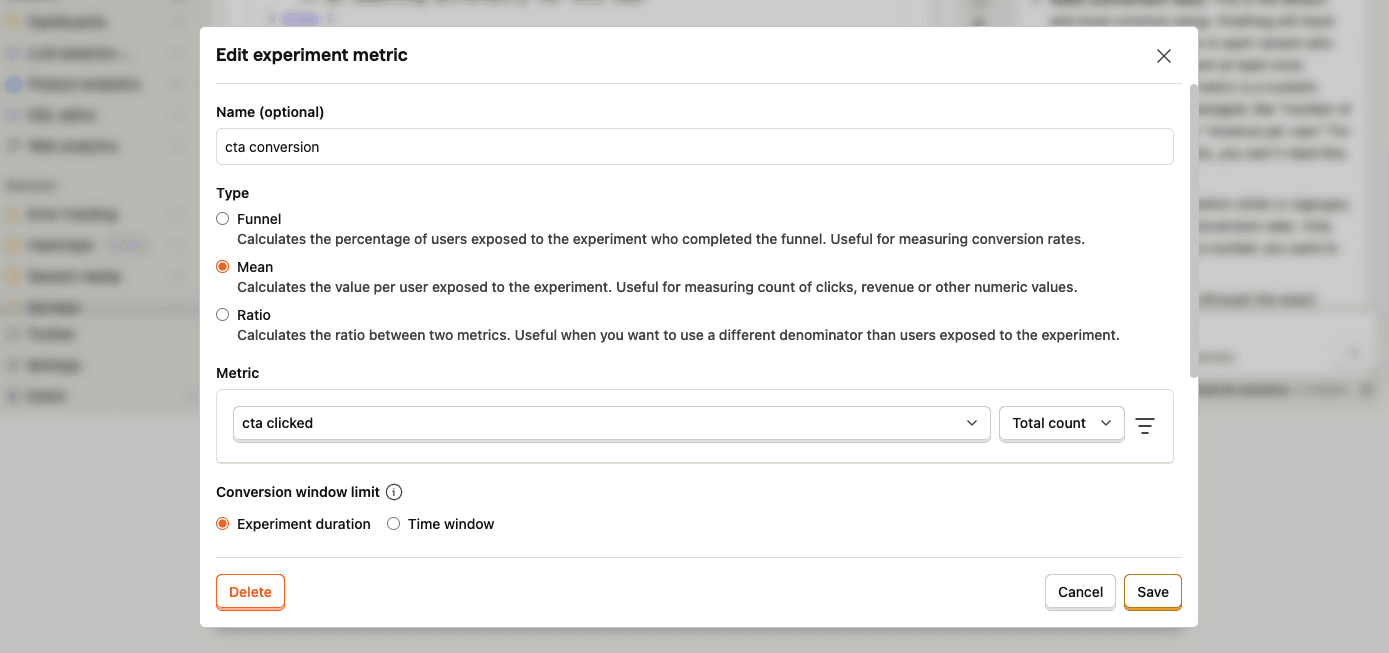
By default, experiments are exposed to 100% of users. You can customize release conditions to expose the experiment to a subset of users.
For this tutorial, we'll ship the experiment to all users and click Launch in the top right.
- 5
Call feature flag
RequiredUse the PostHog SDK to call the experiment flag and update how your page renders based on the assigned variant.
C#Now when a user triggers a
cta clickedevent, PostHog automatically assigns the user to a variant and records an experiment exposure.By default, users are split equally between variants. If you want to assign specific users to a specific variant, see more about distribution and release conditions.
- 6
Evaluate experiment results
RecommendedAs you capture more
cta clickedevents, more exposures will populate the primary metrics in your experiment.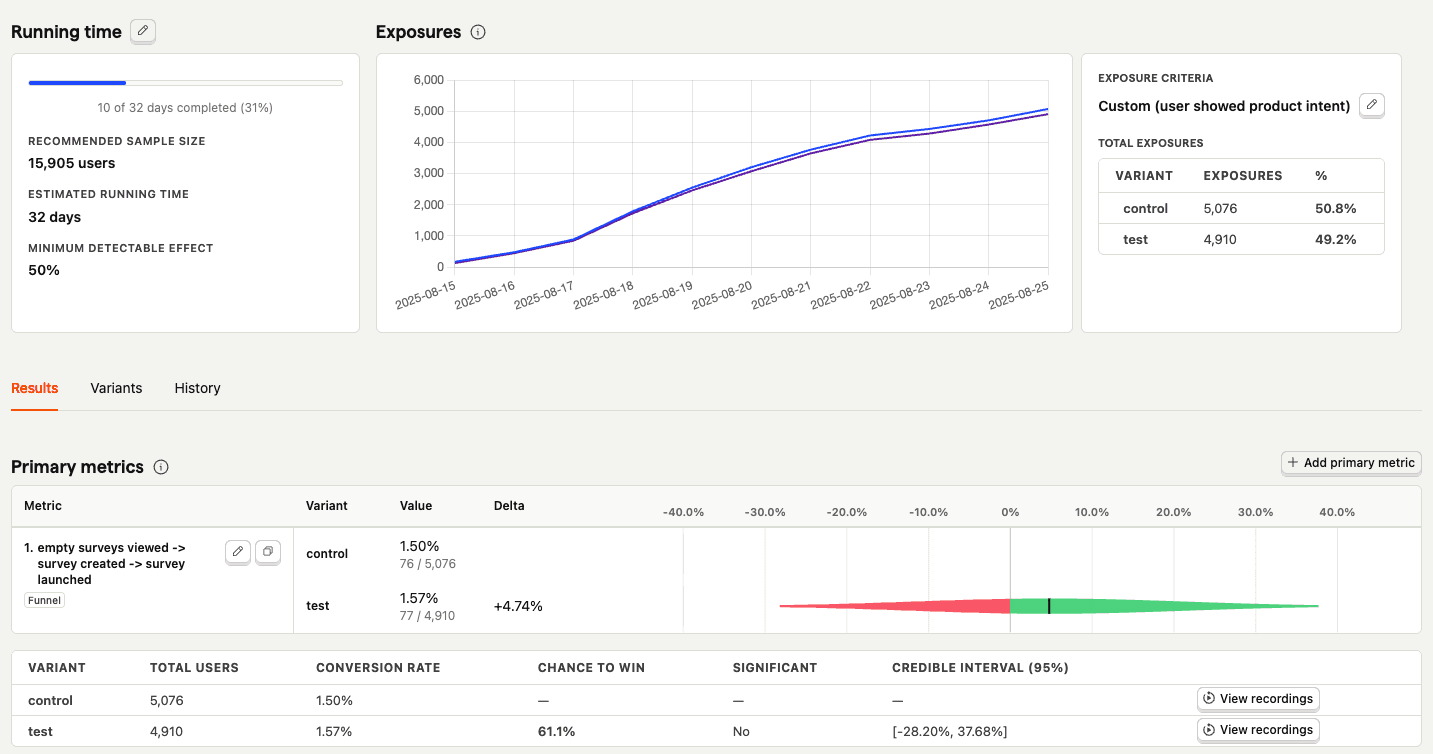
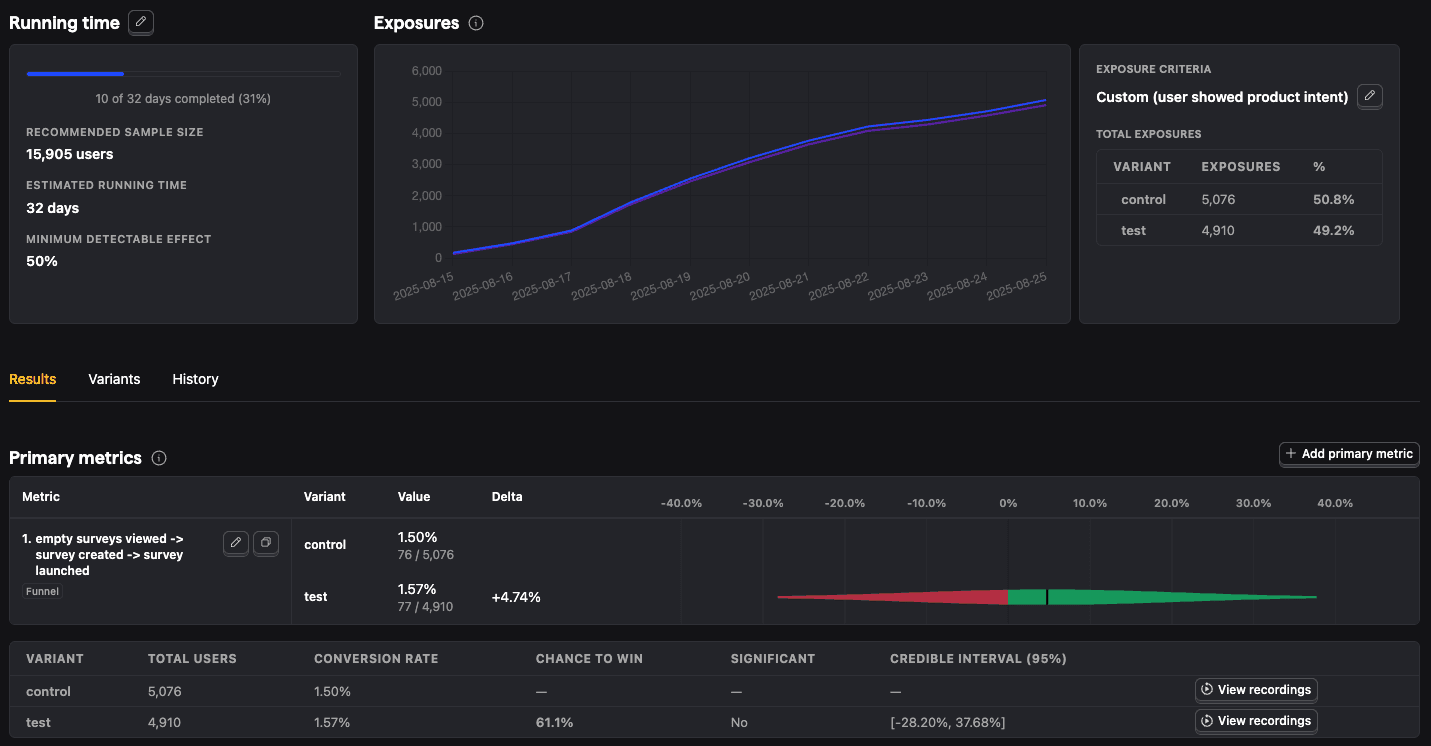
With enough data, you can analyze the experiment and its variants by:
- Conversion rates
- Statistical significance
- Credible intervals
- Chance to win %
- Minimum detectable effect
- And more